
With iOS 8.4 and iTunes 12.2, we got our first look at Apple Music, Apple's new streaming subscription service. While it's a little late to the party, there is definitely an incentive for iOS and Mac OS X users to switch over from competitors due to its heavy integration with the Apple ecosystem.
While switching over from your current service is easy, bringing along all of those playlists you probably spent months and years cultivating and tailoring to perfection is not. But if you're migrating over from Spotify, you're in luck—developer Bartosz Hernas has created a playlist transfer tool dubbed Stamp to help ease the transition.
- Don't Miss: How to Shuffle All Songs in Apple Music
Stamp, which is actually an acronym for Spotify to Apple Music Playlist, works by using a CSV file created through Exportify and an Apple Script to automate the process of adding your Spotify playlists to your Apple Music library. This will work for both free and premium Spotify users and is fully compatible with the free 3-month trial of Apple Music.
Update: Stamp has iOS and Android apps available that take all the work out of transferring playlists, so check those out before continuing below.
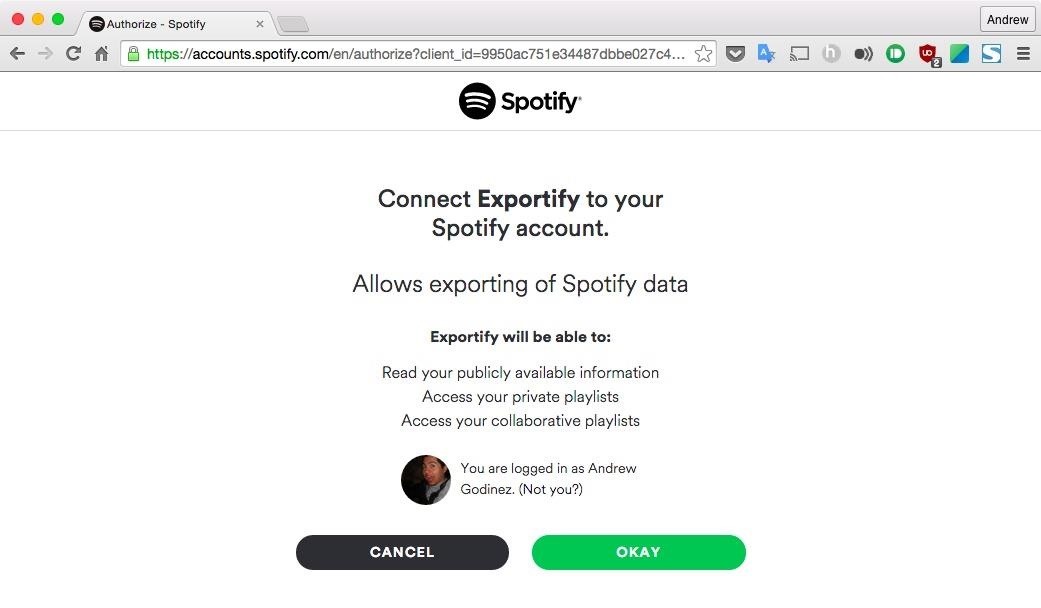
Step 1: Export Your Spotify Playlists
Head over to the Exportify website and log in to your Spotify account. Once you've granted access to Exportify, you'll be able to select which playlists you'd like to export and download to your computer. The file downloaded contains no music files; it simply generates a CSV file with a list of all the songs the playlists contain.
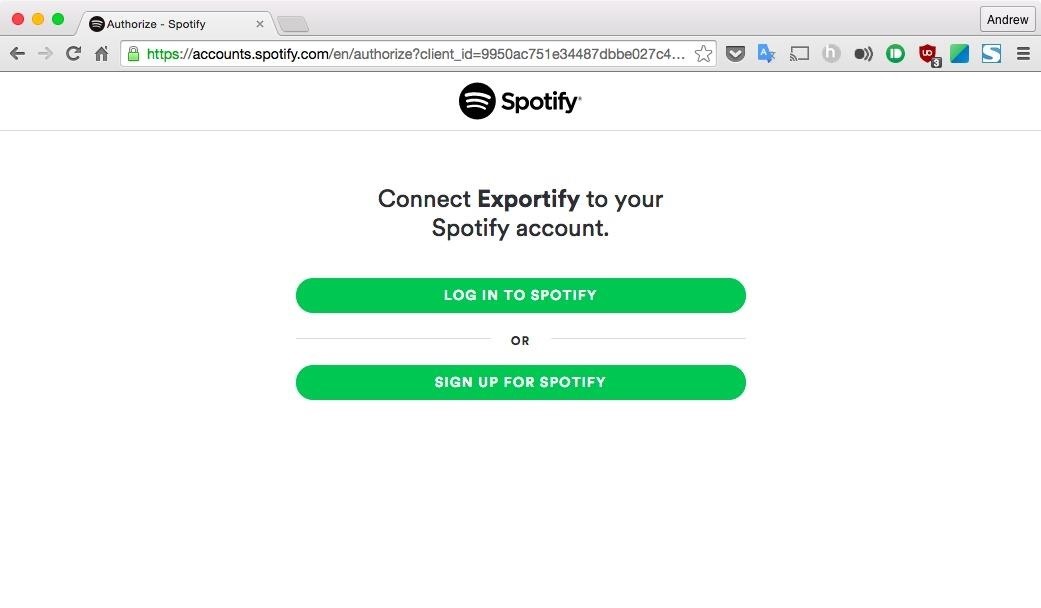
Once completed, you'll see a ZIP file in your Downloads folder labeled "spotify_playlists." Extract the ZIP and leave it in your Downloads folder.
Step 2: Install Stamp
For obvious legal reasons, Stamp cannot be hosted on the Mac App Store, so you will need to download it through the developer's website. Unzip the archive and move the STAMP app to your Applications folder. Before you can open it, depending on your Gatekeeper settings, you may have to allow apps downloaded from unidentified developers.

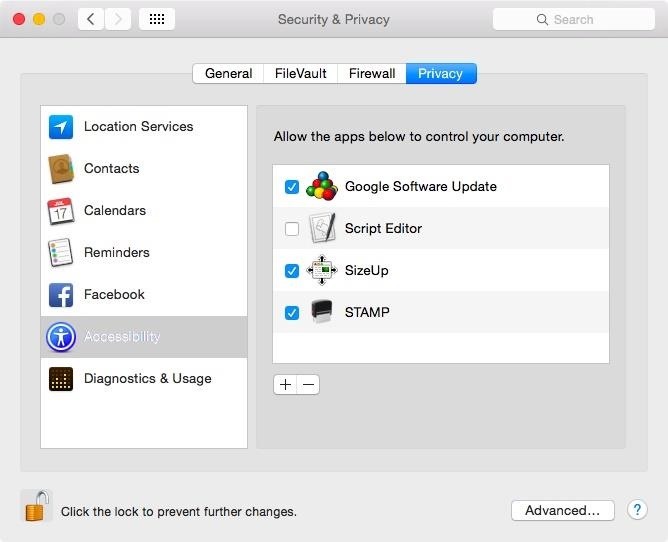
Step 3: Give It Accessibility Privileges
Before using Stamp, you'll need to grant it Accessibility-level access to your Mac, which can be done from System Preferences -> Security & Privacy -> Privacy -> Accessibility. This is needed since the app controls your mouse in order to perform the add-to-playlist click action.
Step 4: Import Playlists
With Stamp properly set up, open the app and select the playlist you want to import to Apple Music. The Apple script behind Stamp automates the search and add-to-playlist clicks, so you'll be able to see the process happen right in front of you in real-time.

This is a new app, so a bug here and there can be expected, but if you ask me, it's a lot better to correct a few song mismatches than to recreate dozens of playlists from scratch.
Just updated your iPhone? You'll find new emoji, enhanced security, podcast transcripts, Apple Cash virtual numbers, and other useful features. There are even new additions hidden within Safari. Find out what's new and changed on your iPhone with the iOS 17.4 update.


4 Comments
I've built this tool. A little more complicated but I was able to import all my 1400+ tracks
http://movetoapplemusic.ramonfritsch.com/
we have been working on a nice tool as well that does the trick.
it's called iSpotMusic www.ispotmusic.com
There is an easier and faster way, www.ispotmusic.com. You just create a cvs file by using there chrome extension. And then just run the ispotmusic tool. that's it no mp3 streaming needed way way faster then any other solution out there.
i would also recommend musconv.com tool to Import Your Spotify Playlists into Apple Music.
Share Your Thoughts