

![Automatically Manage and Sort Files Using Hazel [Mac]](https://img.gadgethacks.com/img/60/26/63441158752858/0/automatically-manage-and-sort-files-using-hazel-mac.300x140.jpg)
In many of my articles, I will refer to applications designed to empower Mac users to automate various tasks on their computer. One such application is called Hazel. Like smart folders, smart playlists, and smart albums found in Mac OS X and iPhoto, Hazel can automate the task of moving, copying, or deleting files in folders on your Mac. I recommend Hazel as one of the most essential applications for any Mac user. Let's explore how it works.
Since all the files in your computer reside in folders, Hazel is designed to run actions on the contents of folders based on rules you set. If that sounds confusing, don't let it be. First, download a 14-day trial version of the application and let's take it for a spin.
Clean Up Your Desktop
To get started with Hazel, you need to select a folder in which you want to apply rules to. You may not realize it, but your Desktop is actually a folder. It could be considered the largest folder on your Mac. Files are pretty easy to park and retrieve there, but sometimes they can start to clutter up the space and slow down your Mac. So let's see how Hazel can automatically clean it up.
After Hazel is installed, open it (it resides in System Preferences of your Mac) and Click on the "+" button at the bottom-left of Hazel. Navigate to your Home folder and open your Desktop folder in Hazel. The Desktop icon should appear under the Folders section.
![Automatically Manage and Sort Files Using Hazel [Mac]](https://img.wonderhowto.com/img/40/14/63441157653141/0/automatically-manage-and-sort-files-using-hazel-mac.w1456.jpg)
Now let's make your first rule. As you can see, I have dozens of automations already set up in my Hazel. Click on + button in the Rules editor. Click on the drop-down button titled, "Name" and select "Any File."
![Automatically Manage and Sort Files Using Hazel [Mac]](https://img.wonderhowto.com/img/45/38/63441157686532/0/automatically-manage-and-sort-files-using-hazel-mac.w1456.jpg)
Next, click on the "+" button on the far right to add another rule. Select the parameter "Date Added" in the first drop-down menu. In the second drop-down menu, select "not in the last", and in the third menu, select "day." What this rule means is that any files on your computer that have been there longer than 24 hours will get moved. So in the text box, you can leave the day as "1" or put any amount of days you like.
![Automatically Manage and Sort Files Using Hazel [Mac]](https://img.wonderhowto.com/img/87/02/63441157728829/0/automatically-manage-and-sort-files-using-hazel-mac.w1456.jpg)
Now we need to tell Hazel where to move those files. I have day-old desktop files relocated to what I call a "Junk Folder". I don't want files on my desktop deleted, I just want them moved out of the way to keep my desktop from being becoming cluttered. Any files moved to my Junk folder can of course be retrieved when needed.
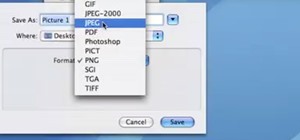
So where it says "Move file," click on the second grayed out drop-down button; scroll down and select "Other". In the resulting dialog box, create a new folder—or select an existing one—for where you want designated files moved to.
Give your rule a name in the Description text box and click on OK. Now, let's test out your first Hazel automation.
Click on the gear shift under the Rules editor and select "Run Rules Now." Any day old files you have on there will be moved to your designated folder. If you don't have any day-old files on your desktop, you can temporarily change the time to a say "'not in the last 1 minute" to see run on recently added files.
![Automatically Manage and Sort Files Using Hazel [Mac]](https://img.wonderhowto.com/img/97/30/63441157863815/0/automatically-manage-and-sort-files-using-hazel-mac.w1456.jpg)
After you get a basic understanding of Hazel, you will start thinking of other folders on your Mac that you want to set rules for. For example, you can set up rules to move files in your Downloads folder, into designated subfolders according to the kinds of files that get downloaded there. All image files could be sent to an image folder, and PDFs could be moved to a PDF folder.
Setting up rules for Hazel might at first seem like an hassle, but taking the time to set them up will save you tons of time in the long run.
Hazel is available for a free 14-day trial, and it cost $21.95 for a license key. It's worth every penny.
Just updated your iPhone? You'll find new emoji, enhanced security, podcast transcripts, Apple Cash virtual numbers, and other useful features. There are even new additions hidden within Safari. Find out what's new and changed on your iPhone with the iOS 17.4 update.


Be the First to Comment
Share Your Thoughts